Post updated on August 10, 2024.

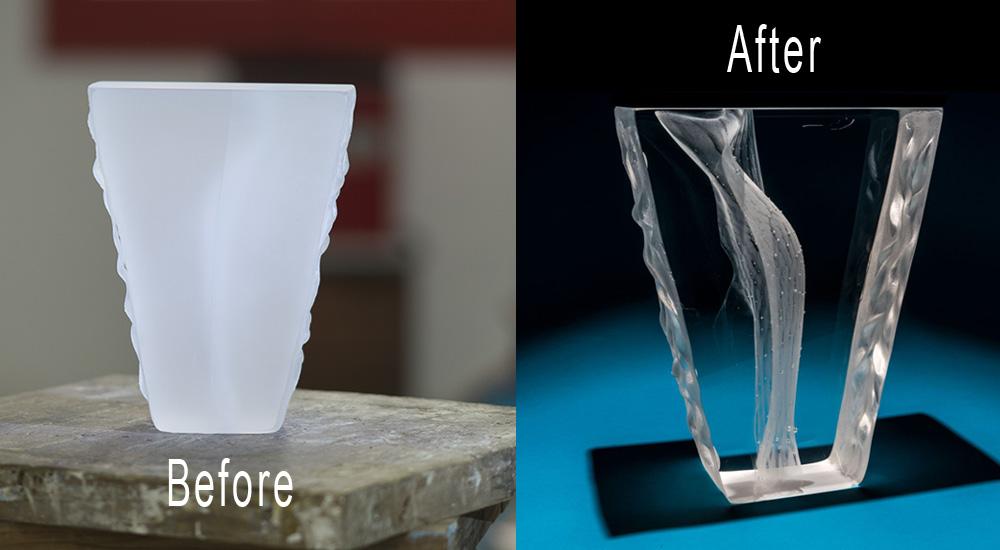
After a glass sculpture is fired in the kiln, it must undergo several grinding and polishing stages to achieve optical transparency.
Cold work is a time-consuming process. I use a vibrating lap machine, which works with silicon carbide abrasive and water. This type of machine takes longer than other methods, like diamond discs, but it’s worth the wait. Polishing a 5-sided piece, for instance, can take up to a hundred hours (around 20 hours per side).
Grinding & pre-polishing steps
The process starts with 80 grit (or 120 depending on how much glass you want to remove) and goes up to 220, 400, 600, and 1,000 grit. To avoid surface tension issues, you can pre-polish the piece with pumice before moving to the polishing cycle. You can also skip the 1,000 grit and go straight from 600 to the final polish (if you do this, the final polishing stage will take just a bit longer).
Here are the average grinding times on a Rociprolap:
- 80-120 grit (rough grind): 3 hours
- 220 grit (semi-smooth): 3 hours
- 400 grit (smooth grind): 4 hours
- 600 grit (super smooth): 4 hours
Grinding tips:
- Pour water into the plate and add 3–4 tablespoons of silicon carbide abrasive. When you reach the 600 grit stage, add a bit of soap to the mix to prevent surface tension.
- Use a permanent marker to draw vertical and horizontal lines on each surface of your sculpture before polishing each stage. This will help ensure each side grinds evenly. Technically, when all the marks are gone, it’s ready for the next stage.
- Add a tablespoon of fresh grit after every hour of polishing.
- When switching from one grit to the next, thoroughly clean the plate. A few bits of previous grit left behind can create scratches on your piece, so make sure it’s impeccably clean.
- Remember: finer grit requires less water. Also, too much water can cause the glass to move without grinding or slow down the grinding process.
- Always wear an FFP3 mask to protect your lungs. Grinding and polishing release ultra-fine dust particles that can damage your lungs in the long term.
Final step: polishing
After completing the grinding and pre-polishing stages, thoroughly clean the disc and bumper ring. Make sure there are no particles of previous grit left behind.
Place the felt polish pad on the surface. Mix cerium oxide with distilled water until you obtain a slurry paste. The consistency should be like heavy cream.
Slowly pour the mix until a light surface of polish slurry covers the pad. Avoid excess water, as this will needlessly slow down the polishing time.
Average polishing time on a Rociprolap:
- Cerium oxide (polishing stage): 4–8 hours.
Polishing tips:
- Inspect the sculpture and remove any previous grit before polishing.
- Use a protection ring to prevent cerium oxide from splashing everywhere.
- Always wear gloves and an FFP3 mask when mixing and pouring cerium oxide.
- Keep a close eye on the piece while it’s polishing to ensure it doesn’t overheat.
Optical glass is extremely demanding. If you’re not careful cleaning the disc between phases, you are likely to encounter an unwelcome guest: scratches.
Glass scratches occur when the disc hasn’t been cleaned properly, and microparticles from a previous grit remain on the surface.
This video shows the process of cleaning the disc to ensure no previous grit is left on the surface. It is a tedious process—you need to take the disc outside every time and use a high-pressure water gun and a brush.
